Fast forward almost two years. I had been working on projects like building fence and shingling the garden shed (By the way, if you ever need any help shingling, I'm busy that day) when a rainy Saturday put outdoor work on hold. Driven by the desire and opportunity to do something in the shop and the guilt of not being able to work outside, I hauled out my small pile of left over cedar...

and set to work.
I've had this router bit set since before my son was born (he'll be 10 this month) and never used it.
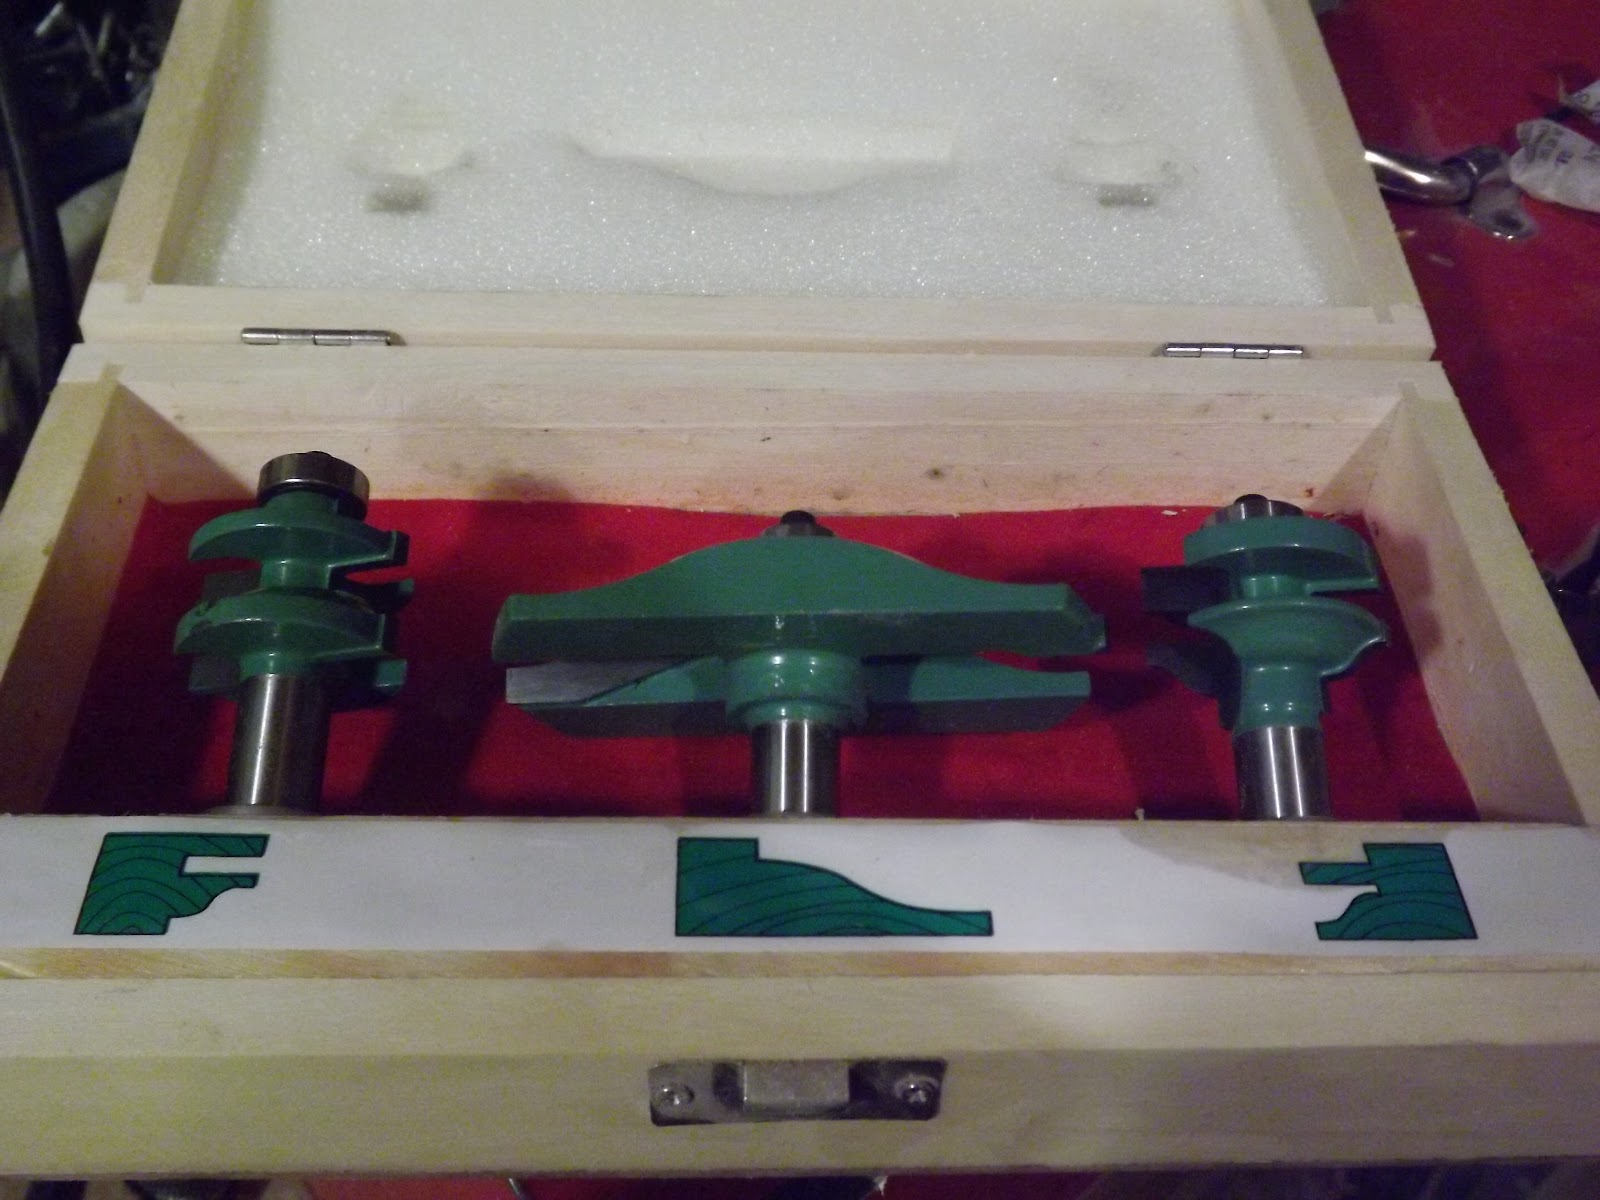
It was a cheap set. I bought it because I wanted to be able to make raised panel doors even though I had no plans to make any raised panel doors. This seemed like a good place to practise.
Going through my pile of wood I wasn't sure I had enough long pieces to make the panel and rails but since this wasn't going in my kitchen I figured I could get away with joining a couple of shorter pieces in the middle.
I started by jointing and planing everything to the proper thickness. At this point Norm would usually glue up the panel and set it aside to dry while he worked on the rails & stiles. My little voice told me that I might need those long pieces if I screwed up my rails so I saved them for later. Next, I set up the bit on the left in the picture above in the router table and made a test cut with a spare piece of cedar I had set aside for the purpose. This is the result.


This is why you do test pieces. Anyway, I ran one side of both the railes and the stiles through so they all had this profile, making sure they were face down and inside against the fence. That part all went fine.
The next step is to make a negative cut on the ends of the rails so that they fit into this profile on the stiles. This is done with the bit on the right side of the photo. In order to keep the rail square to the fence I made this mitre guide.

After a few test cuts I ran the rails through. This is the way the rails and stiles fit togrther.

Hmm... not too bad. Here's the whole frame dry fit together.

Now I can start on the panel without fear that I will have to cut it apart to make new rails. With everything properly jointed there are enough full length pieces to make the panel with 1/2" extra. I cut slots for biscuits, even though I really didn't think I needed them. Sometimes you just want to play with your toys.

I glued the panel together with Gorilla Glue (because it's waterproof) and let it dry overnight.

Now it was time to bring out the big boy router bit, the centre one of the set, to make the profile on the panel. I really liked using this bit because after the panel passed over it the bit created enough of a breeze to blow all the sawdust off the surface of the router table. I used several passes, raising the bit a little each time, to 'raise' the panel. I then used a straight cutting bit to cut a rabbet on the underside of the edge so it would fit into the groove on the frame.

Now it was time to assemble it all and see how it all fit together. I slid the panel into one of the rails. That was fine. Stiles go on the ends... A bit snug but it all fits. Slide in the top rail... It doesn't go in all the way... What the..? AUGHHH! I forgot to cut off that extra 1/2" of width on the panel! Boy, did I feel dumb. At least it was too wide and not too narrow. I trimmed it on the table saw and repeated the previous paragraph on the new edge. I also used my miniature edge plane to shorten the panel just a bit.

The second fitting came together the way it was supposed to so I glued it up and let it set.

So, after two years, the door is finally in place. I didn't realize the huge error I had made, however, until my wife looked at it and asked "So... You can make cupboard doors now?"
